Hello everyone! I’m Carlianne, the author-illustrator behind Best Indie Book Award winner How to Draw Adorable: Joyful Lessons in Creating Cute Art. And today I wanted to share some of my favorite tips for drawing consistent characters from any angle~
I first learned how to do character turnarounds (turn arounds? is this one word or two?) back in college, using a traditional lightbox in my animation classes. Since then, I’ve drawn hundreds—for games, animations, and of course, my own children’s books. So you can trust me when I say these methods are tried and true!
If you’d like to follow along in real time, check out the video version of this tutorial right here:
But without further ado, let's get started!
Step 1: Start With a Character Design
Before you start turning your character around, you’ll need a solid character design to work from. That’s your base!
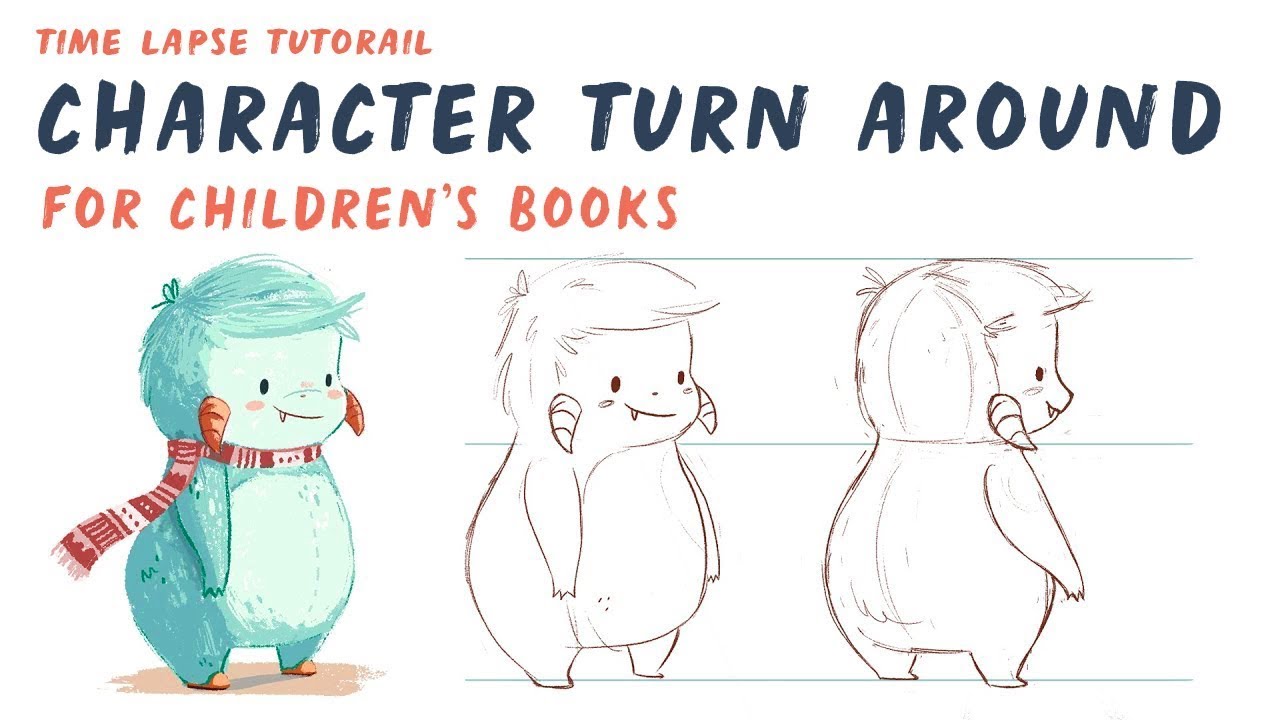
For this example, I’m using the star of my book Even Yetis Get Colds. Introducing: Yeti!

From there, draw some horizontal guide lines across your canvas—things like the top of the head, the eyes, the bottom of the torso, and where the feet land. These help you keep everything aligned from pose to pose. You want your character to stay the same height and proportion no matter the angle.

Step 2: Copy, Paste, and Lighten for Volume Checks
Once you’ve got your character in place and those horizontal guidelines mapped out, it’s time for one of my favorite tricks: copy, paste, and lighten.
I take the original character drawing, paste it next to where the new pose will go, and reduce the opacity so it’s easier to draw over. Why? Because while most people are pretty good at keeping height consistent, volume can get really wibbly-wobbly.
This trick helps you stay on track, especially for the silhouette. I like to trace around the outer edges first so I can get a feel for how wide the character is, not just tall. Consistency is the name of the game!
 And in case you were worried, this is a good time to remind you: tracing isn’t cheating. It’s a learning tool. Especially when it’s your own art!
Step 3: Think in 3D (Even If You’re Drawing in 2D)
As I’m sketching, I’m always thinking about volume. That means imagining the character as a 3D shape, even if my final drawing is 2D.
For example, if I draw a line on Yeti’s back, I’m thinking about how that back curves toward me. That line might not make it into the final sketch, but it helps me visualize how the shape wraps around the form.
And here’s the key: if you’re a beginner, draw those construction lines. They’re like scaffolding for your drawing. I’ve done so many life drawing hours that I can sometimes skip them, but I still rely on the mental version while I draw.
This lets you think of it like a ball, not a flat pancake. You’ll be able to rotate your character more easily and fix mistakes faster.
Step 4: Flip and Overlay to Catch Mistakes
Here’s a tip I picked up from traditional animation classes (hello, lightboxes!). Flip between your poses.
In Photoshop or Procreate, you can toggle visibility and stack layers. This mimics the classic “lift the top paper, check the bottom drawing” technique. And it kind of animates your turnaround a bit—you’ll see where something feels off immediately.
Does the head look suddenly wider? Do the arms shift too high? Flip back and forth and correct those inconsistencies. It’s SO satisfying when it lines up.

Step 5: Adjust and Tweak the Tricky Bits
There’s always one part that refuses to cooperate. For me? It’s usually the ears or arms. (Yeti’s ear in this one was driving me nuts.)
When that happens, don’t be afraid to copy and paste just that little piece—like the ear—from another angle and use it as a placeholder. Then trace and adjust it so it fits the new perspective.
It won’t be a perfect copy—and it shouldn’t be! But it’ll give you a base to tweak, and honestly, it saves a ton of time (and eraser marks).
Step 6: Run the Turnaround Checklist
Now that you’ve drawn a second pose—say, a ¾ back view—it’s time for the consistency check.
☑ Are the feet lining up with the original pose?
☑ Do the eyes hit the same guide line?
☑ Is the width of the shoulders still matching?
I like to do one final “flip and overlay” at this point to make sure everything’s syncing up. If something looks off, now’s the time to tweak it before moving on to the next angle.
Step 7: Rinse and Repeat for the Other Views
You’ll usually want five views in a full turnaround:
• Front view
• 3/4 front (this is the fun, dynamic one!)
• Profile
• 3/4 back
• Back view
I tend to do them in that order, since each one builds on the last. And once you’ve done two or three, the rest go faster—you’ve already made a lot of key decisions!

That’s a Wrap!
Let me know in the comments if you want me to go deeper on any of the steps—like drawing construction lines or flipping layers in Procreate—and I’ll happily make a blog for that.
Happy drawing,
💖 Carlianne


1 comment
Hi! Definitely interested in the blog post with more info! I’d have to get into this to know exactly what i need to know more about but both you mentioned sound interesting